|
|
Title | Date | Type |
| 201 |
 |
Nabeshima Dish | | Image |
| 202 |
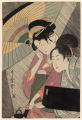 |
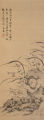
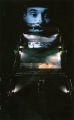
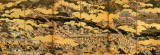
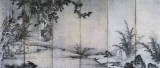
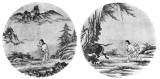
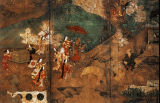
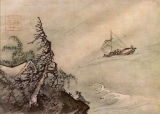
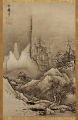
Night Rain | | Image |
| 203 |
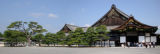 |
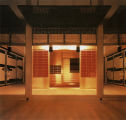
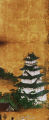
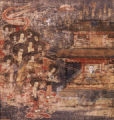
Ninomaru Palace | | Image |
| 204 |
 |
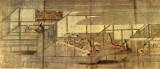
Ninomaru Palace, plan | | Image |
| 205 |
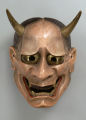 |
Noh Mask (Hannya) | | Image |
| 206 |
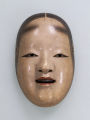 |
Noh Mask (Ko-Omote) | | Image |
| 207 |
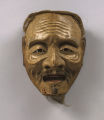 |
Noh Mask (Okina) | | Image |
| 208 |
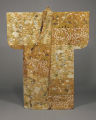 |
Noh Robe with Design of Flowers and Plank Bridges | | Image |
| 209 |
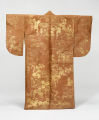 |
Noh Robe with Design of Grapevines and Decorative Paper | | Image |
| 210 |
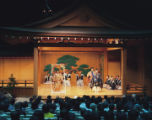 |
Noh Stage | | Image |
| 211 |
 |
Noh Stage | | Image |
| 212 |
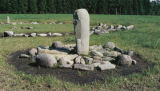 |
Nonakado Stone Circle | | Image |
| 213 |
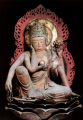 |
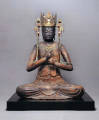
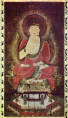
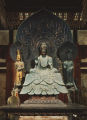
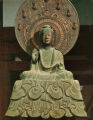
Nyoirin Kannon | | Image |
| 214 |
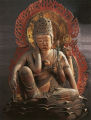 |
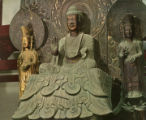
Nyoirin Kannon | | Image |
| 215 |
 |
Octagonal Cup | | Image |
| 216 |
 |
One Hand Clapping | | Image |
| 217 |
 |
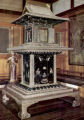
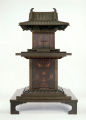
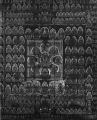
One of the "One Million Pagodas" (Hyakumanto) | | Image |
| 218 |
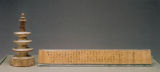 |
One of the "One Million Pagodas" (Hyakumanto) and Printed Buddhist Texts (Dharani) | | Image |
| 219 |
 |
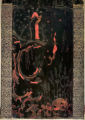
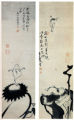
Orchids and Rock with Calligraphy | | Image |
| 220 |
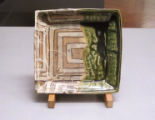 |
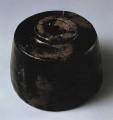
Oribe Square Bowl | | Image |
| 221 |
 |
Oribe Square Bowl | | Image |
| 222 |
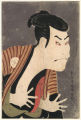 |
Otani Oniji III as Yakko Edobei in the Play The Two-Colored Reins | | Image |
| 223 |
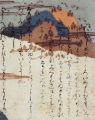 |
Page from the "Ise Shu"; Yamato Bunkakan | | Image |
| 224 |
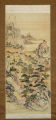 |
Peach Blossom Idyll | | Image |
| 225 |
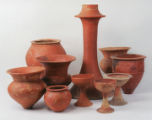 |
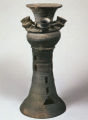
Pedestal and Assorted Vessels | | Image |
| 226 |
 |
pH | | Image |
| 227 |
 |
pH | | Image |
| 228 |
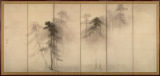 |
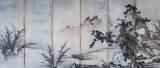
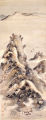
Pine Forest | | Image |
| 229 |
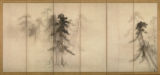 |
Pine Forest | | Image |
| 230 |
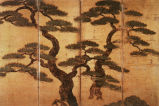 |
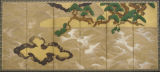
Pine Trees (detail) | | Image |
| 231 |
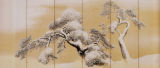 |
Pine Trees in the Snow (detail) | | Image |
| 232 |
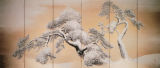 |
Pine Trees in the Snow (detail) | | Image |
| 233 |
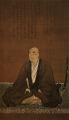 |
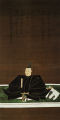
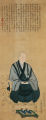
Portrait of Inaba Ittetsu | | Image |
| 234 |
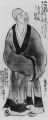 |
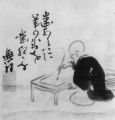
Portrait of Matsuo Basho | | Image |
| 235 |
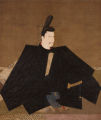 |
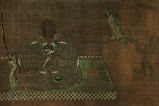
Portrait of Minamoto Yoritomo | | Image |
| 236 |
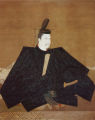 |
Portrait of Minamoto Yoritomo | | Image |
| 237 |
 |
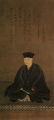
Portrait of Oda Nobunaga | | Image |
| 238 |
 |
Portrait of Oichi No Kata | | Image |
| 239 |
 |
Portrait of Scholar Monk Myoe Shonin | | Image |
| 240 |
 |
Portrait of Sen No Rikyu | | Image |
| 241 |
 |
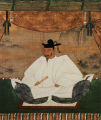
Portrait of Suminokura Ryoi | | Image |
| 242 |
 |
Portrait of Takeda Shingen | | Image |
| 243 |
 |
Portrait of Tenzuiin, Hideyoshi's Mother | | Image |
| 244 |
 |
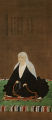
Portrait of the Nun Shun'oku-soei | | Image |
| 245 |
 |
Portrait of Toyotomi Hideyoshi | | Image |
| 246 |
 |
Portrait of Toyotomi Hideyoshi (detail) | | Image |
| 247 |
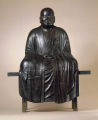 |
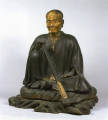
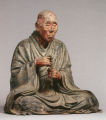
Portrait Sculpture of a Zen Priest | | Image |
| 248 |
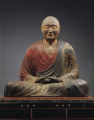 |
Priest Ganjin | | Image |
| 249 |
 |
Priest Ganjin | | Image |
| 250 |
 |
Priest Hui-ko Cutting off his Arm (detail) | | Image |
| 251 |
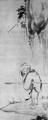 |
Priest Kensu | | Image |
| 252 |
 |
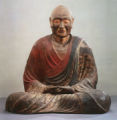
Priest Shunjobo Chogen | | Image |
| 253 |
 |
Printed Buddhist Texts (Dharani) | | Image |
| 254 |
 |
Reconstructed Jomon Pit Dwelling | | Image |
| 255 |
 |
Reconstructed Jomon Pit Dwelling | | Image |
| 256 |
 |
Reconstruction of Toyotomi Hideyoshi's Portable Golden Tea Chamber | | Image |
| 257 |
 |
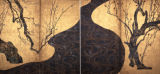
Red and White Plum Blossoms | | Image |
| 258 |
 |
Red and White Plum Blossoms | | Image |
| 259 |
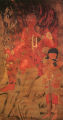 |
Red Fudo (Fudo Myoo) and Attendants | | Image |
| 260 |
 |
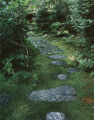
Rock Garden | | Image |
| 261 |
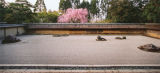 |
Rock Garden | | Image |
| 262 |
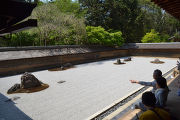 |
Rock Garden | | Image |
| 263 |
 |
Sacred Grove (Harimizu utaki (Harimizu Shrine)) | | Image |
| 264 |
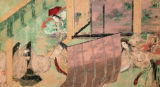 |
Scene form the "Azumaya" (The Eastern Cottage) Chapter of "The Tale of Genji" | | Image |
| 265 |
 |
Scene from the "Minori" (The Rites) Chapter of "The Tale of Genji" | | Image |
| 266 |
 |
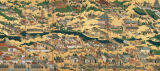
Scenes In and Around the Capital (detail of Gion Festival) | | Image |
| 267 |
 |
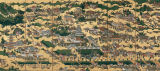
Scenes In and Around the Capital (detail of Kitano Shrine) | | Image |
| 268 |
 |
Scenes In and Around the Capital (left) | | Image |
| 269 |
 |
Scenes In and Around the Capital (left) | | Image |
| 270 |
 |
Scenes In and Around the Capital (right) | | Image |
| 271 |
 |
Scenes In and Around the Capital (right) | | Image |
| 272 |
 |
Screen with Two Kosode | | Image |
| 273 |
 |
Seated Dainichi Nyorai (Mahāvairocana) | | Image |
| 274 |
 |
Self Portrait | | Image |
| 275 |
 |
Seven Sages of the Bamboo Grove (left) | | Image |
| 276 |
 |
Seven Sages of the Bamboo Grove (right) | | Image |
| 277 |
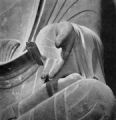 |
Shaka Buddha (detail of left hand in wish-granting mudra) | | Image |
| 278 |
 |
Shaka Nyorai | | Image |
| 279 |
 |
Shaka Triad | | Image |
| 280 |
 |
Shaka Triad | | Image |
| 281 |
 |
Shaka Triad | | Image |
| 282 |
 |
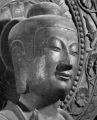
Shaka Triad (detail of Shaka's head) | | Image |
| 283 |
 |
Shaka Triad (top) and Yakushi Buddha (bottom), detail showing skirt draperies | | Image |
| 284 |
 |
Shaka Triad, detail of Shaka's Mandorla showing relief Buddha figure | | Image |
| 285 |
 |
Shaka Triad, rubbing of Shaka's Mandorla | | Image |
| 286 |
 |
Sheaves of Rice and Strips of Paper (Symbolizing Purity) offered to the ‘Kami' by the Emperor | | Image |
| 287 |
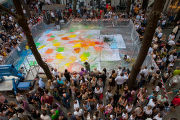 |
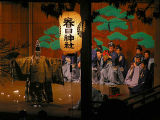
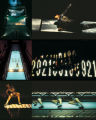
Shimamoto Performance in Corso Garibaldi | | Image |
| 288 |
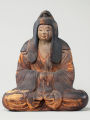 |
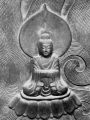
Shinto Goddess | | Image |
| 289 |
 |
Shogunal Procession in Front of Nijo Castle and the Ninonmaru Palace (detail) | | Image |
| 290 |
 |
Shogunal Procession in Front of Nijo Castle and the Ninonmaru Palace (detail) | | Image |
| 291 |
 |
Shogunal Procession in Front of Nijo Castle and the Ninonmaru Palace (detail) | | Image |
| 292 |
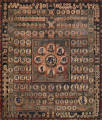 |
Shuji Mandala of the Two Worlds: Mahākaruna Garbhakosa Mandala | | Image |
| 293 |
 |
Shuji Mandala of the Two Worlds: Vajradhātu Mandala | | Image |
| 294 |
 |
Shukongo-jin | | Image |
| 295 |
 |
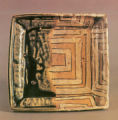
Square Dish | | Image |
| 296 |
 |
Square dish with design of eight bridges (Yatsuhashi) | | Image |
| 297 |
 |
Stones Scattered Here and There | | Image |
| 298 |
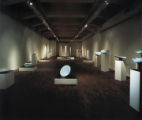 |
Sueharu Fukami Installation at Togakuda Gallery, Kyoto, Japan | | Image |
| 299 |
 |
Sueki Vessel | | Image |
| 300 |
 |
Suit of Armor (Yoroi) | | Image |
| 301 |
 |
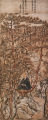
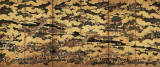
The Summer Siege at Osaka Castle | | Image |
| 302 |
 |
The Summer Siege at Osaka Castle (detail) | | Image |
| 303 |
 |
Tachibana Shrine (detail) | | Image |
| 304 |
 |
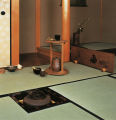
Taian Tea Chamber (interior) | | Image |
| 305 |
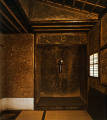 |
Taian Tea Chamber (interior) | | Image |
| 306 |
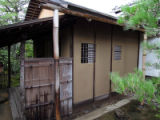 |
Taian Teahouse | | Image |
| 307 |
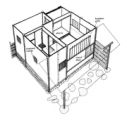 |
Taian Teahouse, cutaway drawing | | Image |
| 308 |
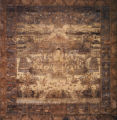 |
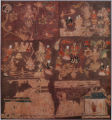
Taima Mandara | | Image |
| 309 |
 |
Taima Mandara (detail) | | Image |
| 310 |
 |
Taima Mandara (detail) | | Image |
| 311 |
 |
Taima Mandara engi emaki, scroll 2, scene 1, showing Princess Chūjō weaving the Taima Mandara | | Image |
| 312 |
 |
Tamamushi Shrine | | Image |
| 313 |
 |
Tamamushi Shrine, detail of "Hungry Tigress" panel | | Image |
| 314 |
 |
Tamamushi Shrine, replica | | Image |
| 315 |
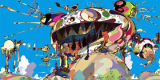 |
Tan Tan Bo Puking - A.K.A. Gero Tan | | Image |
| 316 |
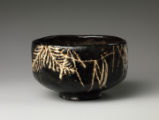 |
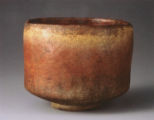
Tea Bowl | | Image |
| 317 |
 |
Tea Caddy | | Image |
| 318 |
 |
Tea Ceremony Kettle | | Image |
| 319 |
 |
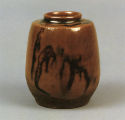
Tea Leaf Jar | | Image |
| 320 |
 |
Teabowl | | Image |
| 321 |
 |
Teabowl | | Image |
| 322 |
 |
Teabowl (view 1) | | Image |
| 323 |
 |
Teabowl (view 2) | | Image |
| 324 |
 |
Teapot | | Image |
| 325 |
 |
Ten Ox Herding Pictures: Catching the Ox (left); Taming the Ox (right) | | Image |
| 326 |
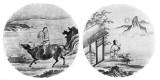 |
Ten Ox Herding Pictures: Riding Home on the Ox (left); The Ox Forgotten, the Self Alone (right) | | Image |
| 327 |
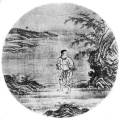 |
Ten Ox Herding Pictures: Searching for the Ox | | Image |
| 328 |
 |
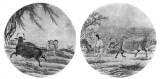
Ten Ox Herding Pictures: Seeing the Tracks (left); Seeing the Ox (right) | | Image |
| 329 |
 |
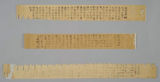
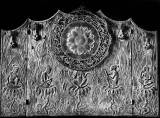
Tenjukoku Embroidery | | Image |
| 330 |
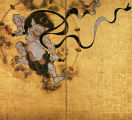 |
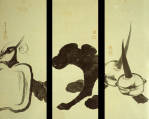
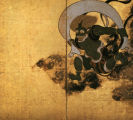
Thunder God | | Image |
| 331 |
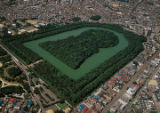 |
Tomb of Emperor Nintoku | | Image |
| 332 |
 |
Toyotomi Hideyoshi at the Daigoji (detail on 6-panel folding screen) | | Image |
| 333 |
 |
Toyotomi Hideyoshi at the Daigoji (detail) | | Image |
| 334 |
 |
True View of Kojima Bay | | Image |
| 335 |
 |
The Two Transcendents Gama and Tekkai | | Image |
| 336 |
 |
Urasenke Tea Garden | | Image |
| 337 |
 |
Urasenke Tea Garden | | Image |
| 338 |
 |
Utensils used in Tea Ceremony | | Image |
| 339 |
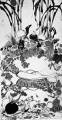 |
Vegetable Parinirvana | | Image |
| 340 |
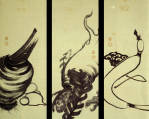 |
Vegetables, view 1 (part of 6 panel folding screen) | | Image |
| 341 |
 |
Vegetables, view 2 (part of 6 panel folding screen) | | Image |
| 342 |
 |
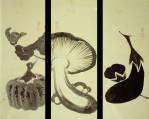
Vegetables, view 3 (part of 6 panel folding screen) | | Image |
| 343 |
 |
Vegetables, view 4 (part of 6 panel folding screen) | | Image |
| 344 |
 |
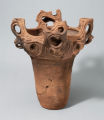
Vessel | | Image |
| 345 |
 |
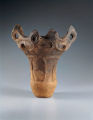
Vessel | | Image |
| 346 |
 |
Vessel | | Image |
| 347 |
 |
Vessel | | Image |
| 348 |
 |
Water Jar | | Image |
| 349 |
 |
Water Jar | | Image |
| 350 |
 |
Water Jar | | Image |
| 351 |
 |
Water Jar | | Image |
| 352 |
 |
Waves of Matsushima (detail) | | Image |
| 353 |
 |
Waves of Matsushima (detail) | | Image |
| 354 |
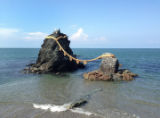 |
Wedded Rocks | | Image |
| 355 |
 |
Wedded Rocks | | Image |
| 356 |
 |
Willow Kannon (Yoryu Kannon) | | Image |
| 357 |
 |
Wind and Waves | | Image |
| 358 |
 |
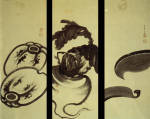
Wind God | | Image |
| 359 |
 |
Winter Landscape | | Image |
| 360 |
 |
Wisdom, Impression, Sentiment | | Image |
| 361 |
 |
Womb World Mandala | | Image |
| 362 |
 |
Woodblock Printing | | Image |
| 363 |
 |
Yakushi Buddha | | Image |
| 364 |
 |
Yakushi Buddha (detail of head) | | Image |
| 365 |
 |
Yakushi Buddha (detail of left hand in wish-granting mudra) | | Image |
| 366 |
 |
Yakushi Buddha (Medicine Buddha) | | Image |
| 367 |
 |
Yakushi Buddha (Medicine Buddha) | | Image |
| 368 |
 |
Yakushi Buddha, detail of Mandorla showing relief Buddha figure | | Image |
| 369 |
 |
Yakushi Buddha, Mandorla | | Image |
| 370 |
 |
Yakushi Nyorai | | Image |
| 371 |
 |
Yakushi Triad | | Image |
| 372 |
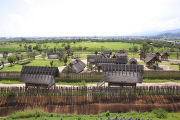 |
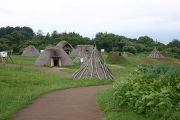
Yoshinogari Historic Site | | Image |
| 373 |
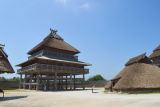 |
Yoshinogari Historic Site, Ceremonial Hall | | Image |
| 374 |
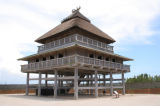 |
Yoshinogari Historic Site, Ceremonial Hall | | Image |
| 375 |
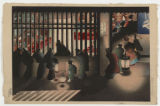 |
Yoshiwara at Night | | Image |
| 376 |
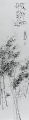 |
Young Bamboo | | Image |
| 377 |
 |
Yugure (Twilight) | | Image |
| 378 |
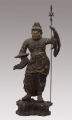 |
Zochoten | | Image |