|
|
Title | Date | Type |
| 1 |
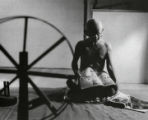 |
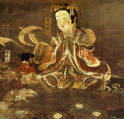
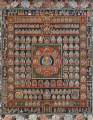
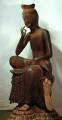
A Requiem: Spinning a Thread Between the Light and the Earth / 1946, India | | Image |
| 2 |
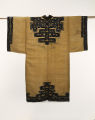 |
Ainu Ceremonial Robe | | Image |
| 3 |
 |
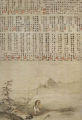
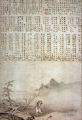
Album Leaf from the "Ishiyama-Gire" | | Image |
| 4 |
 |
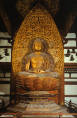
Amida (Amitabha) Triad | | Image |
| 5 |
 |
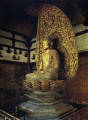
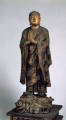
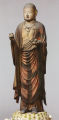
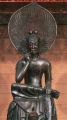
Amida Nyorai | | Image |
| 6 |
 |
Amida Nyorai (Buddha) | | Image |
| 7 |
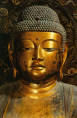 |
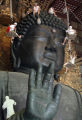
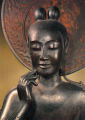
Amida Nyorai (detail of head) | | Image |
| 8 |
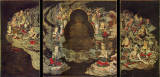 |
Amida Raigō Triptych | | Image |
| 9 |
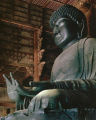
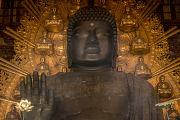
 |
An Open Space | | Image |
| 10 |
 |
Ananda, Discipline of Sakyamuni Buddha | | Image |
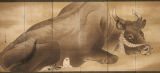
| 11 |
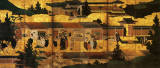 |
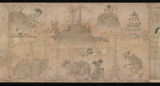
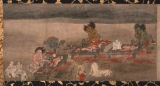
The Arrival of "Southern Barbarians" (left) | | Image |
| 12 |
 |
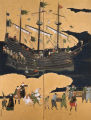
The Arrival of "Southern Barbarians" (right) | | Image |
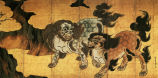
| 13 |
 |
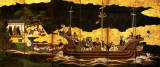
Arrival of the Portuguese | | Image |
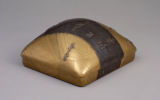
| 14 |
 |
Bed Machine | | Image |
| 15 |
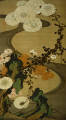 |
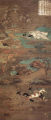
Birds and Chrysanthemums by a Stream | | Image |
| 16 |
 |
Birds and Flowers of the Four Seasons (1) | | Image |
| 17 |
 |
Birds and Flowers of the Four Seasons (2) | | Image |
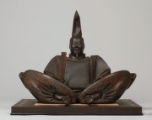
| 18 |
 |
Birth of Shakyamuni Buddha | | Image |
| 19 |
 |
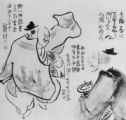
Blind Men Crossing a Bridge | | Image |
| 20 |
 |
Boat Bridge | | Image |
| 21 |
 |
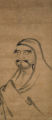
Bodhidharma | | Image |
| 22 |
 |
Bodhidharma Carrying a Single Sandal | | Image |
| 23 |
 |
Bodhidharma Crossing the Yangtze on a Reed | | Image |
| 24 |
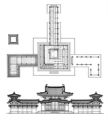
 |
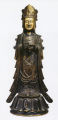
Bodhisattva | | Image |
| 25 |
 |
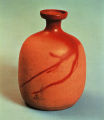
Bottle | | Image |
| 26 |
 |
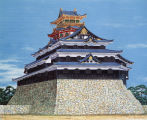
Bowl | | Image |
| 27 |
 |
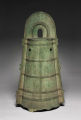
Bowl with Wagtail Design | | Image |
| 28 |
 |
Buddha Roshana | | Image |
| 29 |
 |
Buddha Roshana | | Image |
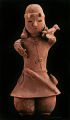
| 30 |
 |
Buddha Roshana | | Image |
| 31 |
 |
Buddha Roshana (detail) | | Image |
| 32 |
 |
Buddhist Monks cleaning the Buddha Roshana | | Image |
| 33 |
 |
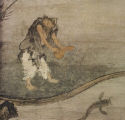
Bull and Puppy (detail) | | Image |
| 34 |
 |
Byoudou-in Temple, general view of wall paintings | | Image |
| 35 |
 |
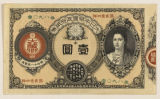
Catching a Catfish with a Gourd | | Image |
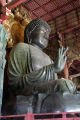
| 36 |
 |
Catching a Catfish with a Gourd | | Image |
| 37 |
 |
Catching a Catfish with a Gourd (detail) | | Image |
| 38 |
 |
Challenging Mud | | Image |
| 39 |
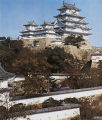
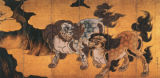 |
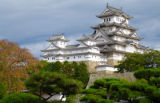
Chinese Lions | | Image |
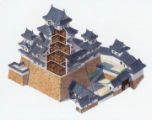
| 40 |
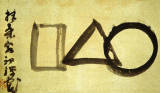 |
Circle, Triangle, and Square (Universe) | | Image |
| 41 |
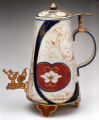 |
Coffee Pot with Dutch Brass Mounting | | Image |
| 42 |
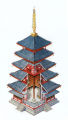
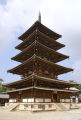
 |
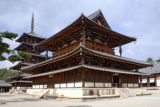
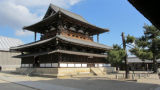
Cosmetic Box | | Image |
| 43 |
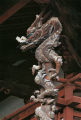
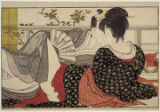 |
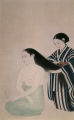
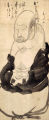
Couple in an Upstairs Room | | Image |
| 44 |
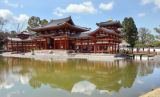
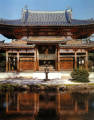
 |
The Crane Scroll (detail) | | Image |
| 45 |
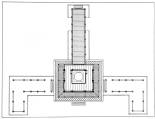
 |
Cypress | | Image |
| 46 |
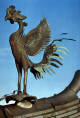
 |
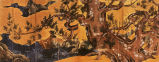
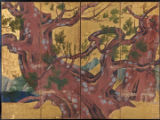
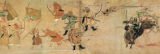
Cypress Tree | | Image |
| 47 |
 |
Cypress Tree (detail of left side) | | Image |
| 48 |
 |
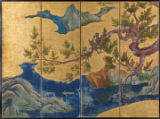
Cypress Tree (detail of right side) | | Image |
| 49 |
 |
Dai Hannya Nagamitsu | | Image |
| 50 |
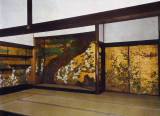 |
Daishoin Hall, interior view | | Image |
| 51 |
 |
Dancing Manzai Comedians | | Image |
| 52 |
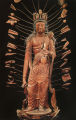
 |
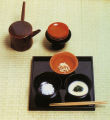
Daninichi Nyorai from the Taizōkai Scroll of Takao Mandara | | Image |
| 53 |
 |
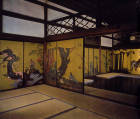
Daninichi Nyorai from the Taizōkai Scroll of the Kyōōgokokuji (Tōji) Mandera | | Image |
| 54 |
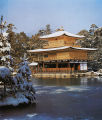
 |
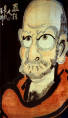
Daruma | | Image |
| 55 |
 |
Daruma in Red | | Image |
| 56 |
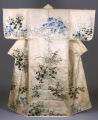
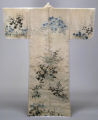
 |
The Death of Shaka | | Image |
| 57 |
 |
The Death of Shaka, detail | | Image |
| 58 |
 |
The Death of Shaka, detail of Disciple | | Image |
| 59 |
 |
The Death of Shaka, detail of Queen Maya and Child | | Image |
| 60 |
 |
Deep Vessel with Handles | | Image |
| 61 |
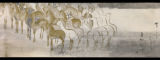 |
Deer Scroll (detail) | | Image |
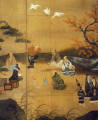
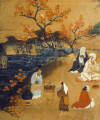
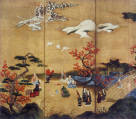
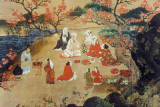
| 62 |
 |
The Descent of Amida | | Image |
| 63 |
 |
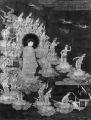
Descent of Amida | | Image |
| 64 |
 |
Descent of Amida and the Celestial Company | | Image |
| 65 |
 |
Descent of Amida with Divine Attendants | | Image |
| 66 |
 |
Descent of Amida, detail of 25 Bodhisattvas | | Image |
| 67 |
 |
Descent of Amida, detail of Bodhisattva | | Image |
| 68 |
 |
The Descent of the Amida Buddha and Twenty-five Bodhisattvas | | Image |
| 69 |
 |
The Descent of the Amida Buddha and Twenty-five Bodhisattvas | | Image |
| 70 |
 |
Development of the Temple Plan in Japan | | Image |
| 71 |
 |
Diagram of the Kongōkai (Diamond World) Mandala | | Image |
| 72 |
 |
Diagram of the Taizōkai (Womb World) Mandala | | Image |
| 73 |
 |
Diagram showing the blocks of wood used by Jocho to create Amida Buddha statue in Phoenix Hall, Byodo-in | | Image |
| 74 |
 |
Diagrammatic Representation of the Taima Mandara | | Image |
| 75 |
 |
Dish | | Image |
| 76 |
 |
Dish | | Image |
| 77 |
 |
Dish | | Image |
| 78 |
 |
Dish with Maple Leaves | | Image |
| 79 |
 |
Dobuku with Design of Gingko Leaves and Snowflakes on Diagonally Patterned Ground | | Image |
| 80 |
 |
Donjon of Azuchi Castle (reconstruction) | | Image |
| 81 |
 |
Doshoku Sai-e, Mandarin Ducks in Snow | | Image |
| 82 |
 |
Drawing of a Shinden-style Mansion | | Image |
| 83 |
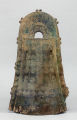
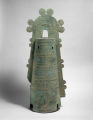 |
Dōtaku (Bronze Bell) | | Image |
| 84 |
 |
Dōtaku (Bronze Bell) | | Image |
| 85 |
 |
Dōtaku (Bronze Bell) | | Image |
| 86 |
 |
Dōtaku (Bronze Bell) | | Image |
| 87 |
 |
Dōtaku (Bronze Bell) with images of animals and people (detail) | | Image |
| 88 |
 |
Electric Dress | | Image |
| 89 |
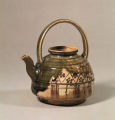 |
Ewer | | Image |
| 90 |
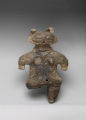 |
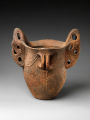
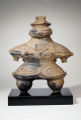
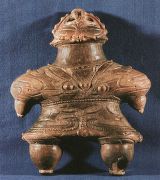
Female Fertility Figure (Dogu) | | Image |
| 91 |
 |
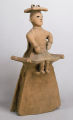
Female Figure | | Image |
| 92 |
 |
Figurine | | Image |
| 93 |
 |
Filigree Banner detail | | Image |
| 94 |
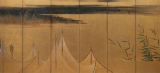 |
Fishnets Drying in the Sun | | Image |
| 95 |
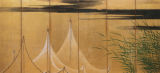 |
Fishnets Drying in the Sun | | Image |
| 96 |
 |
Floating Lights | | Image |
| 97 |
 |
The Flowers of Beauty in the Floating World: Motoura and Yaezakura of the Minami Yamasakiya | | Image |
| 98 |
 |
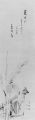
The Four Sleepers | | Image |
| 99 |
 |
Gaki Zoshi | | Image |
| 100 |
 |
Gaki Zoshi | | Image |
| 101 |
 |
Gaki Zoshi, detail of "Hungry Ghosts Eating Feces" | | Image |
| 102 |
 |
Gaki Zoshi, detail of "Hungry Ghosts in a Graveyard" | | Image |
| 103 |
 |
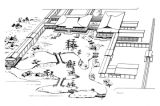
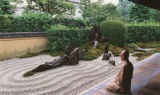
The Garden of Sanboin | | Image |
| 104 |
 |
Garden of the Daisen-in | | Image |
| 105 |
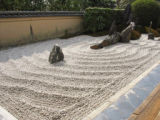 |
Garden of the Daisen-in | | Image |
| 106 |
 |
Gate to the Bashoan | | Image |
| 107 |
 |
Government Banknote featuring Empress Jingu | | Image |
| 108 |
 |
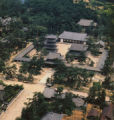
Great Buddha Hall (Daibutsuden) | | Image |
| 109 |
 |
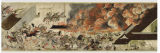
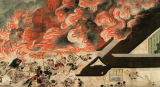
The Great Wave of Kanagawa | | Image |
| 110 |
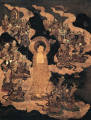 |
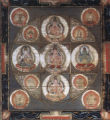
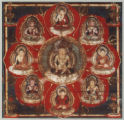
Greeting Picture of Amida and Twenty-five Bodhisattvas | | Image |
| 111 |
 |
Haboku Landscape (detail) | | Image |
| 112 |
 |
Hair | | Image |
| 113 |
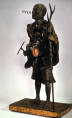
 |
Haniwa Figure of Falconer | | Image |
| 114 |
 |
Haniwa Figure of Seated Female Shaman | | Image |
| 115 |
 |
Heian-Kyo (Kyoto), layout | | Image |
| 116 |
 |
Heiji Monogatari Emaki (Tale of Heiji Scrolls) | | Image |
| 117 |
 |
Heiji Monogatari Emaki (Tale of Heiji Scrolls) (detail) | | Image |
| 118 |
 |
Himeji Castle | | Image |
| 119 |
 |
Himeji Castle | | Image |
| 120 |
 |
Himeji Castle, Isometric Cutaway | | Image |
| 121 |
 |
Hinomaru Illumination (Amaterasu and Haniwa) | | Image |
| 122 |
 |
Hojo Hall, interior view | | Image |
| 123 |
 |
Horyuji Temple Complex | | Image |
| 124 |
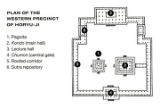 |
Horyuji Temple Complex: plan | | Image |
| 125 |
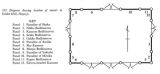 |
Horyuji Temple, Golden Hall, diagram showing location of murals | | Image |
| 126 |
 |
Horyuji, Cross Section of Five Story Pagoda | | Image |
| 127 |
 |
Horyuji, Five Story Pagoda | | Image |
| 128 |
 |
Horyuji, Kondo (Main Hall) | | Image |
| 129 |
 |
Horyuji, Kondo (Main Hall) | | Image |
| 130 |
 |
Horyuji, Kondo (Main Hall), detail of Dragon Posts | | Image |
| 131 |
 |
Hotei Meditating | | Image |
| 132 |
 |
Hurling Colors | | Image |
| 133 |
 |
Hôôdô (Phoenix Hall), exterior view | | Image |
| 134 |
 |
Hôôdô (Phoenix Hall), exterior view | | Image |
| 135 |
 |
Hôôdô (Phoenix Hall), exterior view 2 | | Image |
| 136 |
 |
Hôôdô (Phoenix Hall), ground plan | | Image |
| 137 |
 |
Hôôdô (Phoenix Hall), ground plan and elevation | | Image |
| 138 |
 |
Hôôdô (Phoenix Hall), interior view | | Image |
| 139 |
 |
Hôôdô (Phoenix Hall), ridge end ornament | | Image |
| 140 |
 |
Illustrated History of the Mongol Invasions (Moko Shurai Ekotoba) (detail) | | Image |
| 141 |
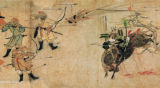 |
Illustrated History of the Mongol Invasions (Moko Shurai Ekotoba) (detail) | | Image |
| 142 |
 |
Imagining the Box (Going) | | Image |
| 143 |
 |
The Impure Aspect of the Human Realm | | Image |
| 144 |
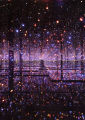 |
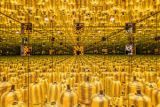
Infinity Mirrored Room filled with the Brilliance of Life | | Image |
| 145 |
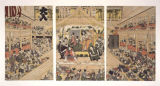 |
Interior of a Kabuki Theater | | Image |
| 146 |
 |
Irises at Yatsuhashi (Eight Bridges) | | Image |
| 147 |
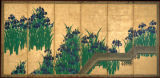 |
Irises at Yatsuhashi (Eight Bridges), left screen | | Image |
| 148 |
 |
Irises at Yatsuhashi (Eight Bridges), right screen | | Image |
| 149 |
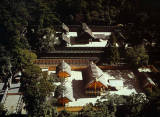 |
Ise Inner Shrine, aerial view | | Image |
| 150 |
 |
Ise Inner Shrine, Treasure Houses of East and West | | Image |
| 151 |
 |
Ise-jingu, Main Hall, Inner Shrine (Geku) | | Image |
| 152 |
 |
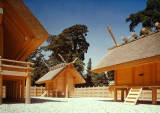
Ise-jingu, Main Hall, Inner Shrine (Naiku) | | Image |
| 153 |
 |
Izumo Edition of Daihoshakkyo Sutra (detail) | | Image |
| 154 |
 |
Jigoku zoshi (Hells Scrolls): The Hell of Dissections | | Image |
| 155 |
 |
Jigoku zoshi (Hells Scrolls): The Hell of Dissections | | Image |
| 156 |
 |
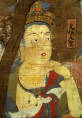
Jizo Bosatu | | Image |
| 157 |
 |
Juichimen Kannon (Eleven-Headed Avalokiteshvara) | | Image |
| 158 |
 |
Kaiseki Meal | | Image |
| 159 |
 |
Kannon (Bodhisattva of Compassion) | | Image |
| 160 |
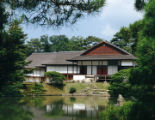 |
Katsura Imperial Villa | | Image |
| 161 |
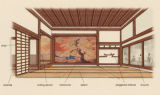
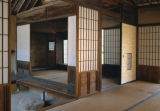 |
Katsura Imperial Villa, interior | | Image |
| 162 |
 |
Kichijoten | | Image |
| 163 |
 |
Kinkaku (Golden Pavilion) | | Image |
| 164 |
 |
Kinkaku (Golden Pavilion) | | Image |
| 165 |
 |
Kinkaku (Golden Pavilion) | | Image |
| 166 |
 |
Kojoion Guest Hall, diagram | | Image |
| 167 |
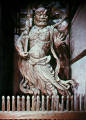
 |
Kongo Rikishi (Ungyo) | | Image |
| 168 |
 |
Kongo Rikishi, Agyo | | Image |
| 169 |
 |
Kosode with Fall Flowers and Grasses | | Image |
| 170 |
 |
Kosode with Fall Flowers and Grasses | | Image |
| 171 |
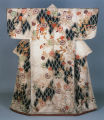 |
Kosode with Net Pattern, Chrysanthemums, and Chinese Characters | | Image |
| 172 |
 |
Kuya Preaching | | Image |
| 173 |
 |
Large Dish | | Image |
| 174 |
 |
Large Sake Flask | | Image |
| 175 |
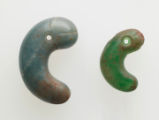 |
Magatama | | Image |
| 176 |
 |
Mandala of the Two Worlds: Diamond World Mandala | | Image |
| 177 |
 |
Mandala of the Two Worlds: Diamond World Mandala | | Image |
| 178 |
 |
Mandala of the Two Worlds: Diamond World Mandala, detail | | Image |
| 179 |
 |
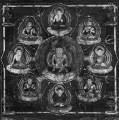
Mandala of the Two Worlds: Mahakaruna Garbhakosa Mandala | | Image |
| 180 |
 |
Mandala of the Two Worlds: Vajradhatu Mandala | | Image |
| 181 |
 |
Mandala of the Two Worlds: Womb World Mandala | | Image |
| 182 |
 |
Mandala of the Two Worlds: Womb World Mandala (detail), Hall of Central Dais Eight Petals | | Image |
| 183 |
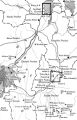 |
Map: Historical Sites in the Kyoto, Osaka, and Nara areas | | Image |
| 184 |
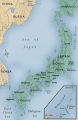 |
Map: Japan | | Image |
| 185 |
 |
Map: Nara, Japan | | Image |
| 186 |
 |
Maple Viewing at Mount Takao | | Image |
| 187 |
 |
Maple Viewing at Mount Takao (detail 1) | | Image |
| 188 |
 |
Maple Viewing at Mount Takao (detail 2) | | Image |
| 189 |
 |
Maple Viewing at Mount Takao (detail 3) | | Image |
| 190 |
 |
Maple Viewing at Mount Takao (detail 4) | | Image |
| 191 |
 |
MInamoto Yoritomo | | Image |
| 192 |
 |
Miroku Bosatsu | | Image |
| 193 |
 |
Miroku Bosatsu | | Image |
| 194 |
 |
Miroku Bosatsu | | Image |
| 195 |
 |
Miroku Bosatsu (detail) | | Image |
| 196 |
 |
Mirror Room - Pumpkin | | Image |
| 197 |
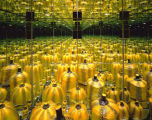 |
Mirror Room - Pumpkin | | Image |
| 198 |
 |
Mold for Buddhist Figure | | Image |
| 199 |
 |
Muro-ji, Kondo (Main Hall) | | Image |
| 200 |
 |
Mythological Chinese Lions | | Image |