|
|
Title | Date | Type |
| 1 |
 |
97 Reunification, I Am Very Happy... | | Image |
| 2 |
 |
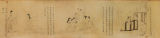
A Book from the Sky (detail) | | Image |
| 3 |
 |
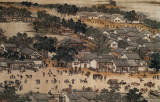
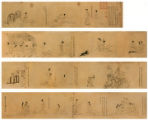
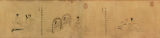
A City of Cathay (detail) | | Image |
| 4 |
 |
A City of Cathay (middle detail of scroll) | | Image |
| 5 |
 |
A Contemporary Emanation of Groslier's grid-based teaching: Drawing Lesson on "Kbach" (ornament) | | Image |
| 6 |
 |
A Drawing Class in the School of Cambodian Arts | | Image |
| 7 |
 |
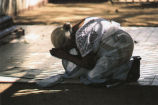
A master sculpts in the specific details of the Buddha image's face after the second layer of malleable wax has been applied | | Image |
| 8 |
 |
A Monk Holds on of 81,137 Wooden Printing Blocks Preserved in the Library at Hae'in-sa Temple | | Image |
| 9 |
 |
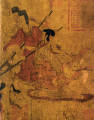
A Monk Under a Bodhi Tree | | Image |
| 10 |
 |
A Pilgrim Prays before the Bo-Tree | | Image |
| 11 |
 |
A Pocket Western Art History about Mao - "Foreign Mao", Mao/Marilyn | | Image |
| 12 |
 |
A Shawl Goat | | Image |
| 13 |
 |
A Shawl Goat | | Image |
| 14 |
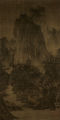 |
A Solitary Temple amid Clearing Peaks | | Image |
| 15 |
 |
A Solitary Temple amid Clearing Peaks (detail) | | Image |
| 16 |
 |
A Solitary Temple amid Clearing Peaks (detail) | | Image |
| 17 |
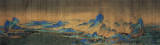 |
A Thousand Li of Rivers and Mountains | | Image |
| 18 |
 |
A Thousand Miles of Rivers and Mountains | | Image |
| 19 |
 |
A Thousand Miles of Rivers and Mountains (detail) | | Image |
| 20 |
 |
A Thousand Miles of Rivers and Mountains (detail) | | Image |
| 21 |
 |
A Thousand Peaks and Myriad Ravines | | Image |
| 22 |
 |
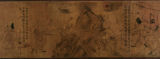
Admonitions of the Instructress to the Court Ladies | | Image |
| 23 |
 |
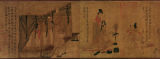
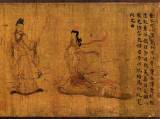
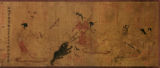
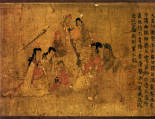
Admonitions of the Instructress to the Court Ladies: Lady Ban Declines to Ride with the Han Emperor Chengdi in the Imperial Palanquin (scene 5), and Lady Feng Protects the Han Emperor Yuandi from the Advance of a Bear (scene 4) | | Image |
| 24 |
 |
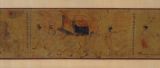
Admonitions of the Instructress to the Court Ladies: The Beginning of Kingship, title piece by the Qianlong Emperor, and Introduction (scene 1) | | Image |
| 25 |
 |
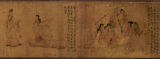
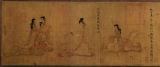
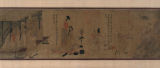
Admonitions of the Instructress to the Court Ladies: The Court Instructress Copies Out the Admonitions (scene 12), and A Lady Kneels in Deference (scene 11) | | Image |
| 26 |
 |
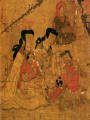
Admonitions of the Instructress to the Court Ladies: The Emperor Rebuffs a Fawning Bauty (scene 10), Three Generations of a Family Gather Together (scene 9), and A Man and Woman in Bed Regard One Another with Suspicion (scene 8) | | Image |
| 27 |
 |
Admonitions of the Instructress to the Court Ladies: The Lady of Wei refusing to Listen to the Licentious Music Favored by her Husband Duke HUan of Qi (scene 3), and Lady Fan Refusing to eat the FLesh of Birds Slaughtered by her Husband King Zhuang of Chu (scene 2) | | Image |
| 28 |
 |
Admonitions of the Instructress to the Court Ladies: Two Court Ladies Admire Themselves (scene 7), and An Archer Readies Himself to Shoot a Tiger (scene 6) | | Image |
| 29 |
 |
Admonitions Scroll | | Image |
| 30 |
 |
Admonitions Scroll, reconstructed order | | Image |
| 31 |
 |
Admonitions Scroll: A Man and a Woman in Bed Regard One Another with Suspicion (scene 5) | | Image |
| 32 |
 |
Admonitions Scroll: A Man and a Woman in Bed Regard One Another with Suspicion (scene 5), Two Court Ladies Admire Themselves (scene 4) | | Image |
| 33 |
 |
Admonitions Scroll: A Man and a Woman in Bed Regard One Another with Suspicion (scene 5, detail) | | Image |
| 34 |
 |
Admonitions Scroll: An Archer Readies Himself to Shoot a Tiger (scene 3) | | Image |
| 35 |
 |
Admonitions Scroll: An Emperor Rebuffs a Fawning Beauty (scene 7) | | Image |
| 36 |
 |
Admonitions Scroll: An Emperor Rebuffs a Fawning Beauty (scene 7), Three Generations of a Family Gather Together (scene 6) | | Image |
| 37 |
 |
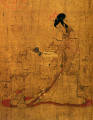
Admonitions Scroll: Lady Ban Declines to Ride with the Han Emperor Chengdi in the Imperial Palanquin (scene 2) | | Image |
| 38 |
 |
Admonitions Scroll: Lady Feng Protects the Han Emperor Yuandi from the Advance of a Wild Bear (scene 1, detail) | | Image |
| 39 |
 |
Admonitions Scroll: Lady Feng Protects the Han Emperor Yuandi from the Advance of a Wild Boar (scene 1) | | Image |
| 40 |
 |
Admonitions Scroll: The Court Instructess Copies Out the 'Admonitions' (scene 9, detail) | | Image |
| 41 |
 |
Admonitions Scroll: The Court Instructress Copies Out the Admonitions (scene 9), A Lady Kneels in Deference (scene 8) | | Image |
| 42 |
 |
Admonitions Scroll: Three Generations of a Family Gather Together (scene 6) | | Image |
| 43 |
 |
Admonitions Scroll: Three Generations of a Family Gather Together (scene 6, detail) | | Image |
| 44 |
 |
Admonitions Scroll: Two Court Ladies Admiring Themselves (scene 4, detail) | | Image |
| 45 |
 |
Admonitions Scroll: Two Court Ladies Admiring Themselves (scene 4, detail) | | Image |
| 46 |
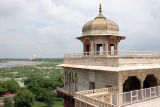 |
Agra Fort, Musamman Burj | | Image |
| 47 |
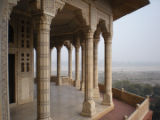 |
Agra Fort, Musamman Burj | | Image |
| 48 |
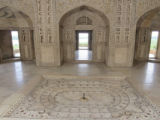 |
Agra Fort, Musamman Burj (interior) | | Image |
| 49 |
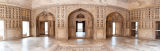 |
Agra Fort, Musamman Burj (interior) | | Image |
| 50 |
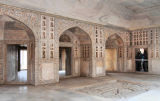 |
Agra Fort, Musamman Burj (interior) | | Image |
| 51 |
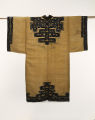 |
Ainu Ceremonial Robe | | Image |
| 52 |
 |
Ajanta Cave 10: Worship of the Buddha | | Image |
| 53 |
 |
Ajanta Cave 16: The Conversion of Nanda | | Image |
| 54 |
 |
Ajanta Cave 17 Porch, Wheel of Rebirth | | Image |
| 55 |
 |
Ajanta Cave 17 Porch, Wheel of Rebirth detail: Couple and Tree | | Image |
| 56 |
 |
Ajanta Cave 17 Porch, Wheel of Rebirth detail: Garuda with Snake in its Beak | | Image |
| 57 |
 |
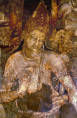
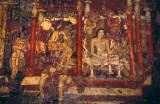
Ajanta Cave 17 wall painting depicting the story of the Buudha's previous life as Vessantara, a king of legendary generosity | | Image |
| 58 |
 |
Ajanta Cave 19: Chaitya Facade | | Image |
| 59 |
 |
Ajanta Cave 19: View of Facade | | Image |
| 60 |
 |
Ajanta Cave 1: Buddha's Hands in Dharmacakra Mudra (shrine detail) | | Image |
| 61 |
 |
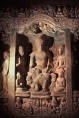
Ajanta Cave 1: Seated Bodhisattva | | Image |
| 62 |
 |
Ajanta Cave 1: Seated Bodhisattva (detail) | | Image |
| 63 |
 |
Ajanta Cave 1: Vajrapani Attendant (Rear wall of Hall, to the right of the Buddha) | | Image |
| 64 |
 |
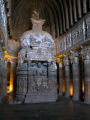
Ajanta Cave 2: Hall Shrine with Hariti | | Image |
| 65 |
 |
Ajanta Cave 4, Buddha Shrine in the Vihara | | Image |
| 66 |
 |
Ajanta Caves Exterior | | Image |
| 67 |
 |
Ajanta Caves Exterior | | Image |
| 68 |
 |
Ajanta Caves Exterior | | Image |
| 69 |
 |
Ajanta Caves Exterior | | Image |
| 70 |
 |
Ajanta Caves Exterior | | Image |
| 71 |
 |
Ajanta Caves Interior | | Image |
| 72 |
 |
Ajanta Caves Interior | | Image |
| 73 |
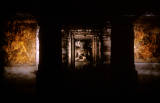 |
Ajanta Caves Interior | | Image |
| 74 |
 |
Ajanta Caves Interior | | Image |
| 75 |
 |
Ajanta Caves Interior | | Image |
| 76 |
 |
Ajanta Caves Interior, View to Stupa | | Image |
| 77 |
 |
Ajanta Caves Interior, View to Stupa | | Image |
| 78 |
 |
Ajanta Caves Interior, View to Stupa | | Image |
| 79 |
 |
Ajanta Caves Wall Painting | | Image |
| 80 |
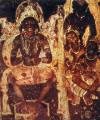 |
Ajanta Caves Wall Painting | | Image |
| 81 |
 |
Ajanta Caves Wall Painting | | Image |
| 82 |
 |
Ajanta Caves Wall Painting | | Image |
| 83 |
 |
Ajanta Caves Wall Painting | | Image |
| 84 |
 |
Ajanta Caves Wall Painting | | Image |
| 85 |
 |
Ajanta Caves Wall Painting (detail) | | Image |
| 86 |
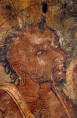 |
Ajanta Caves Wall Painting (detail) | | Image |
| 87 |
 |
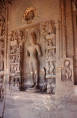
Ajanta Caves, Buddha | | Image |
| 88 |
 |
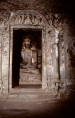
Ajanta Caves, Buddha Niche | | Image |
| 89 |
 |
Ajanta Caves, Buddha Niche | | Image |
| 90 |
 |
Ajanta Caves, Buddha Niche | | Image |
| 91 |
 |
Ajanta Caves, Buddha Niche | | Image |
| 92 |
 |
Ajanta Caves, Reclining Buddha | | Image |
| 93 |
 |
Ajanta Caves: Approach up the Wahgora River Gorge | | Image |
| 94 |
 |
Ajanta Caves: Caves 1 - 14, from the Wahgora River Bed | | Image |
| 95 |
 |
Ajanta Caves: Caves 14 - 28, seen from the Sat Kund Falls | | Image |
| 96 |
 |
Ajanta Caves: General View from the South over the Wahgora River Gorge | | Image |
| 97 |
 |
Ajanta Caves: General View of Caves 1 - 29 | | Image |
| 98 |
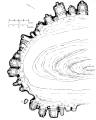 |
Ajanta Caves: Ground Plan | | Image |
| 99 |
 |
Ajanta Caves: Sat Kund Falls, at the west end of the Wahgora River Gorge | | Image |
| 100 |
 |
Akbar Building Fatehpur Sikri, History of Akbar (Akbarnama) | | Image |