Home
Browse
Ask Us
Chat
Harmful Language Statement
Log in
Art and Art History
Advanced Search
About
Curriculum-based images for use in teaching, research, and learning.
Type
Image
164
Format
image/jpeg
164
Collection
Art and Art History
164
Filters:
Style Period:
"Byzantine Art (Byzantium)"
Subject:
"Architecture"
76
-
100
of
164
<
1
2
3
4
5
6
7
>
Gallery view
Number of results to display per page
10
25
50
100
200
Sort by Relevance
Sort by Title A-Z
Sort by Title Z-A
Sort by Date Ascending
Sort by Date Descending
Sort by Last Modified Ascending
Sort by Last Modified Descending
Title
Date
Type
76
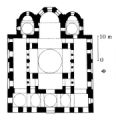
Hagia Sophia (Salonica), ground plan
Image
77
Hagia Sophia, 4th century plan, hypothetical reconstruction overlaid on Justinian's church
Image
78
Hagia Sophia, central space, view from the southwest
Image
79
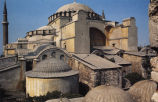
Hagia Sophia, exterior view
Image
80
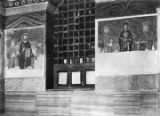
Hagia Sophia, interior south gallery, east bay, east wall, Imperial portrait mosaics
Image
81
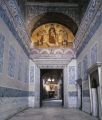
Hagia Sophia, narthex, looking into the central space through the center (imperial) door
Image
82
Hagia Sophia, Salonica (Thessaloniki), isometric view
Image
83
Hagia Sophia, south door into the inner narthex
Image
84
Hagios Demetrios, exterior view
Image
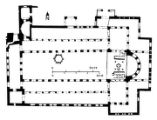
85
Hagios Demetrios, ground plan
Image
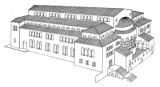
86
Hagios Demetrios, reconstruction drawing
Image
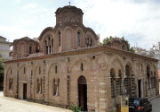
87
Holy Apostles Church, exterior view
Image
88
Holy Apostles Church, ground plan
Image
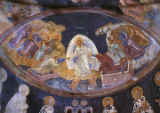
89
Kariye Camii (Church of St. Savior in Chora), apse of the parekklesion fresco: Anastasis (or Harrowing of Hell)
Image
90
Kariye Camii (Church of St. Savior in Chora), decoration plan
Image
91
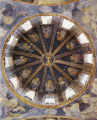
Kariye Camii (Church of St. Savior in Chora), dome mosaic: The Presentation of the Virgin in the Temple
Image
92
Kariye Camii (Church of St. Savior in Chora), dome mosaic: Virgin and Child with Attendant Angels
Image
93
Kariye Camii (Church of St. Savior in Chora), exterior view
Image
94
Kariye Camii (Church of St. Savior in Chora), Funerary Chapel
Image
95
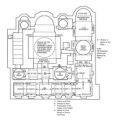
Kariye Camii (Church of St. Savior in Chora), ground plan
Image
96
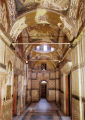
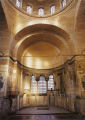
Kariye Camii (Church of St. Savior in Chora), inner narthex looking south
Image
97
Kariye Camii (Church of St. Savior in Chora), inner narthex mosaic: Christ and the Theotokos
Image
98
Kariye Camii (Church of St. Savior in Chora), inner narthex mosaic: Christ with Theodore Metochites
Image
99
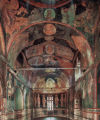
Kariye Camii (Church of St. Savior in Chora), interior of Naos looking east into the Bema
Image
100
Kariye Camii (Church of St. Savior in Chora), Last Judgement, with Entry of the Elect into Paradise (left) and Torments of the Damned (right)
Image
76
-
100
of
164
<
1
2
3
4
5
6
7
>