|
|
Title | Creator | Creation Date |
| 1 |
 |
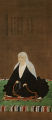
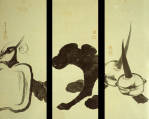
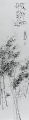
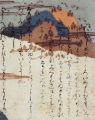
Challenging Mud | Kazuo Shiraga | 1955 CE |
| 2 |
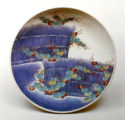 |
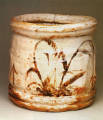
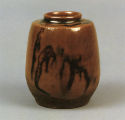
Dish | | 17th - 18th Century CE |
| 3 |
 |
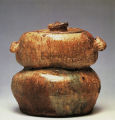
Bottle | | 18th Century CE |
| 4 |
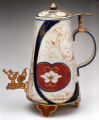 |
Coffee Pot with Dutch Brass Mounting | | 17th Century CE |
| 5 |
 |
Dish | | 17th Century CE |
| 6 |
 |
Dish | | 1650 - 1660 CE |
| 7 |
 |
Bowl with Wagtail Design | | 16th Century CE |
| 8 |
 |
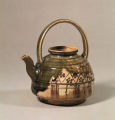
Teapot | | 17th Century CE |
| 9 |
 |
Octagonal Cup | | 16th Century CE |
| 10 |
 |
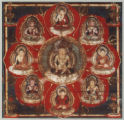
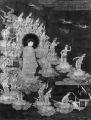
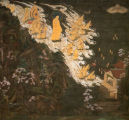
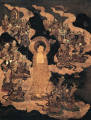
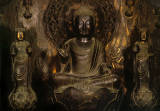
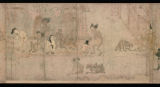
Descent of Amida, detail of 25 Bodhisattvas | | ca. 13th Century CE |
| 11 |
 |
Descent of Amida, detail of Bodhisattva | | late 13th Century CE |
| 12 |
 |
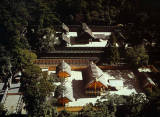
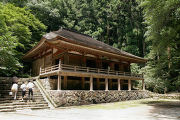
Hôôdô (Phoenix Hall), interior view | | ca. 1052 CE |
| 13 |
 |
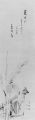
One Hand Clapping | Hakuin Ekaku | 18th Century CE |
| 14 |
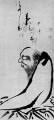 |
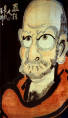
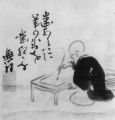
Bodhidharma | Hakuin Ekaku | mid 18th Century CE |
| 15 |
 |
Willow Kannon (Yoryu Kannon) | Itō Jakuchū | 18th Century CE |
| 16 |
 |
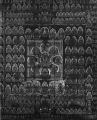
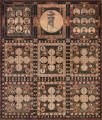
Taima Mandara (detail) | | 1300 - 1325 CE |
| 17 |
 |
Taima Mandara | | 1300 - 1325 CE |
| 18 |
 |
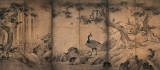
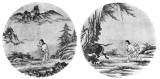
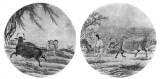
Maple Viewing at Mount Takao (detail 1) | Kano Hideyori | third quarter of 16th Century CE |
| 19 |
 |
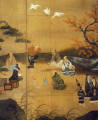
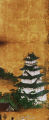
Maple Viewing at Mount Takao | Kano Hideyori | third quarter of 16th Century CE |
| 20 |
 |
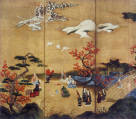
Maple Viewing at Mount Takao (detail 4) | Kano Hideyori | third quarter of 16th Century CE |
| 21 |
 |
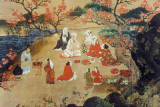
Maple Viewing at Mount Takao (detail 2) | Kano Hideyori | third quarter of 16th Century CE |
| 22 |
 |
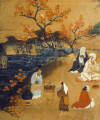
Maple Viewing at Mount Takao (detail 3) | Kano Hideyori | third quarter of 16th Century CE |
| 23 |
 |
Amida Nyorai (detail of head) | Jocho | 1053 CE |
| 24 |
 |
Descent of Amida with Divine Attendants | | 1053 CE |
| 25 |
 |
Byoudou-in Temple, general view of wall paintings | | 1053 CE |
| 26 |
 |
Taima Mandara (detail) | | 1300 - 1325 CE |
| 27 |
 |
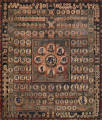
Mandala of the Two Worlds: Diamond World Mandala | | 859 - 880 CE |
| 28 |
 |
Mandala of the Two Worlds: Diamond World Mandala | | 859 - 880 CE |
| 29 |
 |
Mandala of the Two Worlds: Womb World Mandala (detail), Hall of Central Dais Eight Petals | | 859 - 880 CE |
| 30 |
 |
Bodhidharma Carrying a Single Sandal | | 1296 CE |
| 31 |
 |
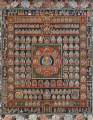
Mandala of the Two Worlds: Womb World Mandala | | 9th Century CE |
| 32 |
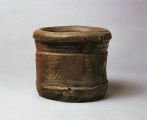
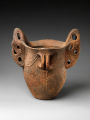 |
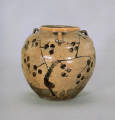
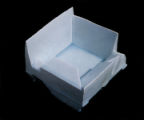
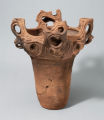
Deep Vessel with Handles | | ca. 3500 - 2500 BCE |
| 33 |
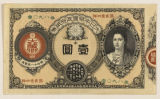 |
Government Banknote featuring Empress Jingu | | 1878 CE |
| 34 |
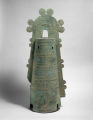 |
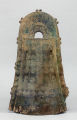
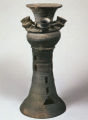
Dōtaku (Bronze Bell) | | 1st - 2nd Century CE |
| 35 |
 |
Catching a Catfish with a Gourd | Taiko Josetsu | 15th Century CE |
| 36 |
 |
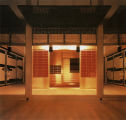
Taian Tea Chamber (interior) | Sen no Rikyu | 1580s CE |
| 37 |
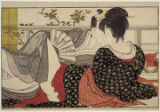 |
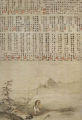
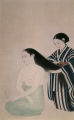
Couple in an Upstairs Room | Kitagawa Utamaro | 1788 CE |
| 38 |
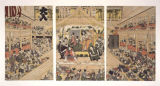 |
Interior of a Kabuki Theater | Utagawa Toyokuni | ca. 1800 CE |
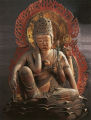
| 39 |
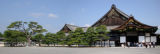 |
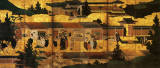
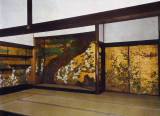
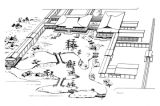
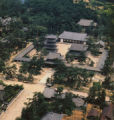
Ninomaru Palace | | |
| 40 |
 |
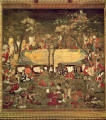
Descent of Amida and the Celestial Company | | early 15th Century CE |
| 41 |
 |
Womb World Mandala | | early 11th Century CE |
| 42 |
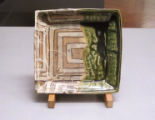 |
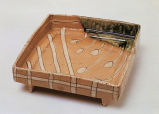
Oribe Square Bowl | | late 16th Century CE |
| 43 |
 |
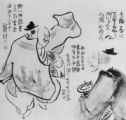
Portrait of Suminokura Ryoi | | ca. 1616 CE |
| 44 |
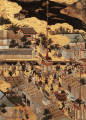 |
Scenes In and Around the Capital (detail of Gion Festival) | | second quarter of 17th Century CE |
| 45 |
 |
Scenes In and Around the Capital (detail of Kitano Shrine) | | second quarter of 17th Century CE |
| 46 |
 |
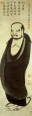
Ananda, Discipline of Sakyamuni Buddha | | ca. 1650 CE |
| 47 |
 |
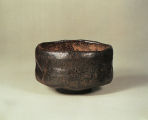
Teabowl (view 2) | Hon'ami Koetsu | early 17th Century CE |
| 48 |
 |
The Crane Scroll (detail) | Hon'ami Koetsu (calligrapher); Tawaraya Sotatsu (underpainting) | ca. 1605 - 1615 CE |
| 49 |
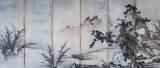 |
Seven Sages of the Bamboo Grove (right) | Unkoku Togan | early 17th Century CE |
| 50 |
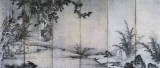 |
Seven Sages of the Bamboo Grove (left) | Unkoku Togan | early 17th Century CE |
| 51 |
 |
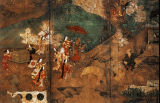
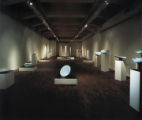
The Arrival of "Southern Barbarians" (left) | | late 16th Century CE |
| 52 |
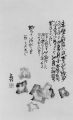
 |
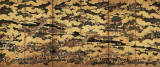
Scenes In and Around the Capital (right) | | second quarter of 17th Century CE |
| 53 |
 |
Scenes In and Around the Capital (left) | | second quarter of 17th Century CE |
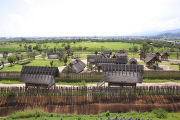
| 54 |
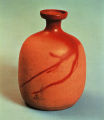
 |
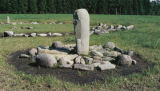
Water Jar | | late 16th Century CE |
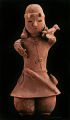
| 55 |
 |
The Arrival of "Southern Barbarians" (right) | | early 17th Century CE |
| 56 |
 |
Birds and Flowers of the Four Seasons (2) | Kano Shoei | ca. 1560s CE |
| 57 |
 |
Birds and Flowers of the Four Seasons (1) | Kano Shoei | ca. 1560s CE |
| 58 |
 |
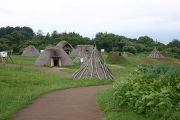
Screen with Two Kosode | | late 16th Century CE - early 17th Century CE |
| 59 |
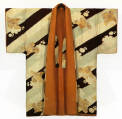 |
Dobuku with Design of Gingko Leaves and Snowflakes on Diagonally Patterned Ground | | ca. 1602 CE |
| 60 |
 |
Scenes In and Around the Capital (right) | | second quarter of 17th Century CE |
| 61 |
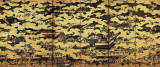 |
Scenes In and Around the Capital (left) | | second quarter of 17th Century CE |
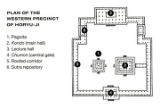
| 62 |
 |
Tea Leaf Jar | | early 17th Century CE |
| 63 |
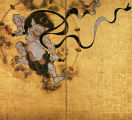 |
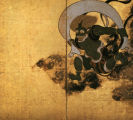
Thunder God | Tawaraya Sotatsu | second quarter of 17th Century CE |
| 64 |
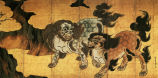 |
Mythological Chinese Lions | Kano Eitoku | late 1580's CE |
| 65 |
 |
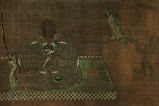
Portrait of Inaba Ittetsu | Hasegawa Tohaku | 1589 CE |
| 66 |
 |
Portrait of Sen No Rikyu | Hasegawa Tohaku | ca. 1595 CE |
| 67 |
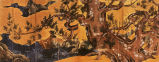 |
Cypress | Kano Eitoku | ca. 1580's CE |
| 68 |
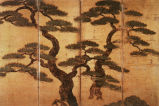 |
Pine Trees (detail) | Tosa Mitsunobu | early 16th Century CE |
| 69 |
 |
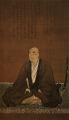
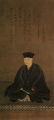
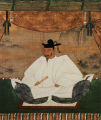
Portrait of Takeda Shingen | Hasegawa Tohaku | ca. 1570's CE |
| 70 |
 |
Portrait of Toyotomi Hideyoshi | | ca. 1600 CE |
| 71 |
 |
Portrait of Tenzuiin, Hideyoshi's Mother | | 1615 CE |
| 72 |
 |
Water Jar | | Body: late 16th Century CE; Lid: 17th or 18th Century CE |
| 73 |
 |
Tea Caddy | | early 17th Century CE |
| 74 |
 |
Water Jar | | ca. 1600 CE, before 1608 CE |
| 75 |
 |
Square Dish | | early 17th Century CE |
| 76 |
 |
Ewer | | early 17th Century CE |
| 77 |
 |
Reconstruction of Toyotomi Hideyoshi's Portable Golden Tea Chamber | | |
| 78 |
 |
The Summer Siege at Osaka Castle (detail) | Hasegawa Toi | early 17th Century CE |
| 79 |
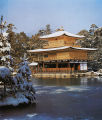 |
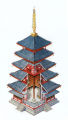
Kinkaku (Golden Pavilion) | | 1397 - 1399 CE |
| 80 |
 |
Donjon of Azuchi Castle (reconstruction) | | 1579 - 82 CE |
| 81 |
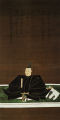 |
Portrait of Oda Nobunaga | | 1583 CE |
| 82 |
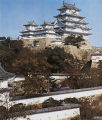 |
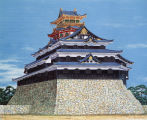
Himeji Castle | | ca. 1333 - 1346 CE; major expansions 1601 - 1608 CE |
| 83 |
 |
Portrait of Toyotomi Hideyoshi (detail) | | ca. 1600 CE |
| 84 |
 |
Portrait of Oichi No Kata | | 1589 CE |
| 85 |
 |
Toyotomi Hideyoshi at the Daigoji (detail) | | ca. 1598 - 1615 CE |
| 86 |
 |
The Garden of Sanboin | | ca. 1598 CE |
| 87 |
 |
Wind God | Tawaraya Sotatsu | second quarter of 17th Century CE |
| 88 |
 |
Teabowl (view 1) | Hon'ami Koetsu | early 17th Century CE |
| 89 |
 |
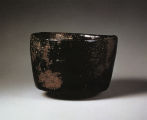
Teabowl | Chojiro | late 16th Century CE |
| 90 |
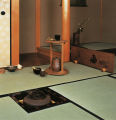 |
Utensils used in Tea Ceremony | | March 28 - 29, 1990 CE |
| 91 |
 |
Large Sake Flask | | late 16th Century CE |
| 92 |
 |
Water Jar | | late 16th Century CE |
| 93 |
 |
Large Dish | | late 16th Century CE |
| 94 |
 |
Tea Ceremony Kettle | | early 17th Century CE |
| 95 |
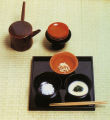 |
Kaiseki Meal | | |
| 96 |
 |
The Summer Siege at Osaka Castle | Hasegawa Toi | early 17th Century CE |
| 97 |
 |
Square dish with design of eight bridges (Yatsuhashi) | Ogata Kenzan | 1712 - 1716 CE |
| 98 |
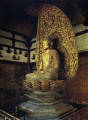 |
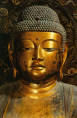
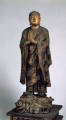
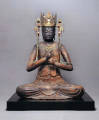
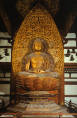
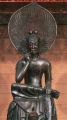
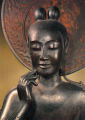
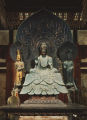
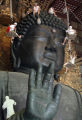
Amida Nyorai (Buddha) | Jōchō (Jōchō Busshi) | ca. 1053 CE |
| 99 |
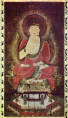 |
Shaka Nyorai | | 12th Century CE |
| 100 |
 |
Amida Raigō Triptych | | late 11th Century CE |
| 101 |
 |
Daninichi Nyorai from the Taizōkai Scroll of Takao Mandara | | 1st half of 9th Century CE |
| 102 |
 |
Taima Mandara engi emaki, scroll 2, scene 1, showing Princess Chūjō weaving the Taima Mandara | | mid 13th Century CE |
| 103 |
 |
Daninichi Nyorai from the Taizōkai Scroll of the Kyōōgokokuji (Tōji) Mandera | | 2nd half of 9th Century CE |
| 104 |
 |
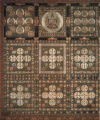
Diagram of the Kongōkai (Diamond World) Mandala | | |
| 105 |
 |
Diagram of the Taizōkai (Womb World) Mandala | | |
| 106 |
 |
Hinomaru Illumination (Amaterasu and Haniwa) | Yukinori Yanagi | 1993 CE |
| 107 |
 |
Bed Machine | Shin Egashira | 1991 CE |
| 108 |
 |
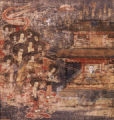
The Impure Aspect of the Human Realm | | late 13th Century CE |
| 109 |
 |
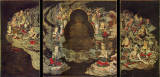
The Descent of the Amida Buddha and Twenty-five Bodhisattvas | | 13th Century CE |
| 110 |
 |
The Death of Shaka | | 1086 CE |
| 111 |
 |
Diagrammatic Representation of the Taima Mandara | | |
| 112 |
 |
Mandala of the Two Worlds: Mahakaruna Garbhakosa Mandala | | 16th Century CE |
| 113 |
 |
Mandala of the Two Worlds: Vajradhatu Mandala | | 16th Century CE |
| 114 |
 |
Shuji Mandala of the Two Worlds: Mahākaruna Garbhakosa Mandala | | 14th Century CE |
| 115 |
 |
Shuji Mandala of the Two Worlds: Vajradhātu Mandala | | 14th Century CE |
| 116 |
 |
Birth of Shakyamuni Buddha | | 13th Century CE |
| 117 |
 |
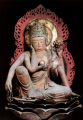
Seated Dainichi Nyorai (Mahāvairocana) | | 12th Century CE |
| 118 |
 |
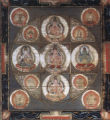
Greeting Picture of Amida and Twenty-five Bodhisattvas | | 15th Century CE |
| 119 |
 |
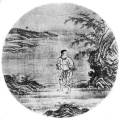
The Descent of Amida | | ca. 1300 CE |
| 120 |
 |
Ise Inner Shrine, aerial view | | ca. 687 CE |
| 121 |
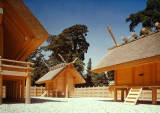 |
Ise Inner Shrine, Treasure Houses of East and West | | ca. 687 CE |
| 122 |
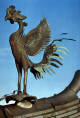 |
Hôôdô (Phoenix Hall), ridge end ornament | | ca. 11th Century CE |
| 123 |
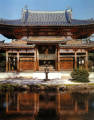 |
Hôôdô (Phoenix Hall), exterior view 2 | | 11th Century CE |
| 124 |
 |
Descent of Amida | | ca. 13th Century CE |
| 125 |
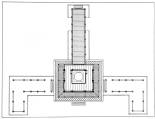 |
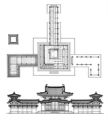
Hôôdô (Phoenix Hall), ground plan | | |
| 126 |
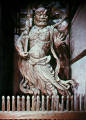 |
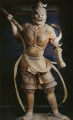
Kongo Rikishi, Agyo | Unikei; Kaikei | ca. 1203 CE |
| 127 |
 |
Amida Nyorai | Jocho | 1053 CE |
| 128 |
 |
Haboku Landscape (detail) | Sesshu Toyo | 1495 CE |
| 129 |
 |
Vegetables, view 1 (part of 6 panel folding screen) | Ito Jakuchu | 1796 CE |
| 130 |
 |
Daruma in Red | Hakuin Ekaku | 18th Century CE |
| 131 |
 |
Blind Men Crossing a Bridge | Hakuin Ekaku | 18th Century CE |
| 132 |
 |
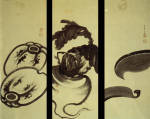
Bodhidharma Crossing the Yangtze on a Reed | Ito Jakuchu | ca. 1760 - 1765 CE |
| 133 |
 |
Vegetables, view 2 (part of 6 panel folding screen) | Ito Jakuchu | 1796 CE |
| 134 |
 |
Vegetables, view 4 (part of 6 panel folding screen) | Ito Jakuchu | 1796 CE |
| 135 |
 |
Vegetables, view 3 (part of 6 panel folding screen) | Ito Jakuchu | 1796 CE |
| 136 |
 |
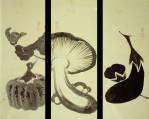
Doshoku Sai-e, Mandarin Ducks in Snow | Ito Jakuchu | 1759 CE |
| 137 |
 |
Priest Hui-ko Cutting off his Arm (detail) | Sesshu Toyo | ca. 1496 CE |
| 138 |
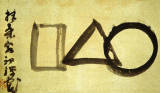 |
Circle, Triangle, and Square (Universe) | Sengai | 17th - 18th Century CE |
| 139 |
 |
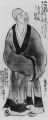
Priest Kensu | Kao | second quarter of 14th Century CE |
| 140 |
 |
Vegetable Parinirvana | Ito Jakuchu | ca. 1780 CE |
| 141 |
 |
Amida (Amitabha) Triad | | |
| 142 |
 |
Mold for Buddhist Figure | | 8th Century CE |
| 143 |
 |
The Four Sleepers | Mokuan Reien | early 14th Century CE |
| 144 |
 |
Ten Ox Herding Pictures: Riding Home on the Ox (left); The Ox Forgotten, the Self Alone (right) | attributed to Shubun | first half of 15th Century CE |
| 145 |
 |
Hojo Hall, interior view | | ca. 14th Century CE |
| 146 |
 |
Ten Ox Herding Pictures: Seeing the Tracks (left); Seeing the Ox (right) | attributed to Shubun | first half of 15th Century CE |
| 147 |
 |
Ten Ox Herding Pictures: Catching the Ox (left); Taming the Ox (right) | attributed to Shubun | first half of 15th Century CE |
| 148 |
 |
Ten Ox Herding Pictures: Searching for the Ox | attributed to Shubun | first half of 15th Century CE |
| 149 |
 |
Yakushi Nyorai | | late 8th - 10th Century CE |
| 150 |
 |
Bodhisattva | | 8th Century CE |
| 151 |
 |
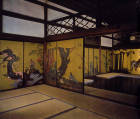
Daishoin Hall, interior view | Hasegawa Kyuzo | |
| 152 |
 |
Hair | Kobayashi Kokei | 1931 CE |
| 153 |
 |
Imagining the Box (Going) | Sueharu Fukami | 1995 CE |
| 154 |
 |
An Open Space | Masamichi Yoshikawa | 1998 CE |
| 155 |
 |
Sueharu Fukami Installation at Togakuda Gallery, Kyoto, Japan | Sueharu Fukami | 1995 CE |
| 156 |
 |
Portrait of Matsuo Basho | Yosa Buson | ca. 1776 CE |
| 157 |
 |
Gate to the Bashoan | Matsuo Basho | |
| 158 |
 |
Self Portrait | Yosa Buson | ca. 1775 - 1777 CE |
| 159 |
 |
Stones Scattered Here and There | Yosa Buson | ca. 1776 CE |
| 160 |
 |
Dancing Manzai Comedians | Yosa Buson | ca. 1771 CE |
| 161 |
 |
Young Bamboo | Yosa Buson | |
| 162 |
 |
Yoshinogari Historic Site | | 1st - 3rd Century CE |
| 163 |
 |
Yakushi Buddha (Medicine Buddha) | | late 7th - early 8th Century CE |
| 164 |
 |
Nonakado Stone Circle | | ca. 1500 - 1000 BCE |
| 165 |
 |
Haniwa Figure of Falconer | | 6th Century CE |
| 166 |
 |
Page from the "Ise Shu"; Yamato Bunkakan | | ca. 1112 CE |
| 167 |
 |
Miroku Bosatsu | | 7th Century CE |
| 168 |
 |
Drawing of a Shinden-style Mansion | | |
| 169 |
 |
Muro-ji, Kondo (Main Hall) | | 9th Century CE, modified in the early 13th Century CE |
| 170 |
 |
Buddha Roshana | | 8th Century CE, reconstructed 17th Century CE |
| 171 |
 |
Dōtaku (Bronze Bell) | | 2nd - 3rd Century CE |
| 172 |
 |
Gaki Zoshi | | 12th Century CE |
| 173 |
 |
Miroku Bosatsu | | 7th Century CE |
| 174 |
 |
Vessel | | 1st - 3rd Century CE |
| 175 |
 |
Kichijoten | | 8th Century CE |
| 176 |
 |
Reconstructed Jomon Pit Dwelling | | |
| 177 |
 |
Gaki Zoshi | | 12th Century CE |
| 178 |
 |
Tamamushi Shrine, detail of "Hungry Tigress" panel | | ca. 650 CE |
| 179 |
 |
Sacred Grove (Harimizu utaki (Harimizu Shrine)) | | |
| 180 |
 |
Nyoirin Kannon | | ca. 840 CE |
| 181 |
 |
Gaki Zoshi, detail of "Hungry Ghosts Eating Feces" | | 12th Century CE |
| 182 |
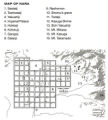 |
Map: Nara, Japan | | |
| 183 |
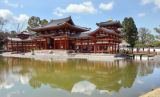 |
Hôôdô (Phoenix Hall), exterior view | | 11th Century CE |
| 184 |
 |
Horyuji Temple Complex | | 7th Century CE |
| 185 |
 |
Shaka Triad | | 623 CE |
| 186 |
 |
Horyuji Temple Complex: plan | | 7th Century CE |
| 187 |
 |
Reconstructed Jomon Pit Dwelling | | |
| 188 |
 |
Nyoirin Kannon | | ca. 840 CE |
| 189 |
 |
Sueki Vessel | | ca. 6th Century CE |
| 190 |
 |
Hôôdô (Phoenix Hall), ground plan and elevation | | 11th Century CE |
| 191 |
 |
Horyuji, Cross Section of Five Story Pagoda | | 7th Century CE |
| 192 |
 |
Heian-Kyo (Kyoto), layout | | |
| 193 |
 |
Great Buddha Hall (Daibutsuden) | | original structure completed during the Nara Period in 752 CE, destroyed in 1180 CE, current building completed in 1707 CE, restored 1906-1913 |
| 194 |
 |
Vessel | | ca. 10,500 - 300 BCE |
| 195 |
 |
Shukongo-jin | | 8th Century CE |
| 196 |
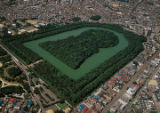 |
Tomb of Emperor Nintoku | | late 4th - early 5th Century CE |
| 197 |
 |
Buddhist Monks cleaning the Buddha Roshana | | 8th Century CE, reconstructed 17th Century CE |
| 198 |
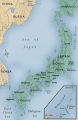 |
Map: Japan | | |
| 199 |
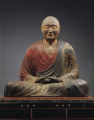 |
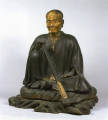
Priest Ganjin | | 8th Century CE |
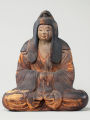
| 200 |
 |
Shinto Goddess | | 9th Century CE |