|
|
Title | Creator | Creation Date |
| 1 |
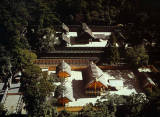 | Ise Inner Shrine, aerial view | | ca. 687 CE |
| 2 |
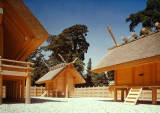 | Ise Inner Shrine, Treasure Houses of East and West | | ca. 687 CE |
| 3 |
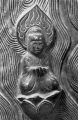
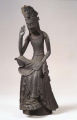 | Seated Bodhisattva in "Pensive Posture" | | 7th Century CE |
| 4 |
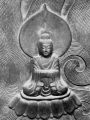
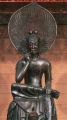 | Miroku Bosatsu | | 7th Century CE |
| 5 |
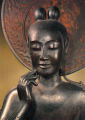 | Miroku Bosatsu | | 7th Century CE |
| 6 |
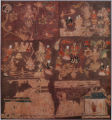
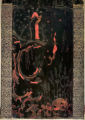 | Tamamushi Shrine, detail of "Hungry Tigress" panel | | ca. 650 CE |
| 7 |
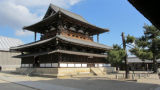
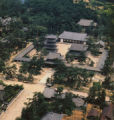 | Horyuji Temple Complex | | 7th Century CE |
| 8 |
 | Shaka Triad | | 623 CE |
| 9 |
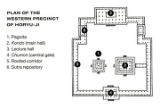 | Horyuji Temple Complex: plan | | 7th Century CE |
| 10 |
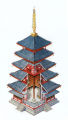 | Horyuji, Cross Section of Five Story Pagoda | | 7th Century CE |
| 11 |
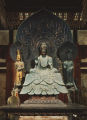
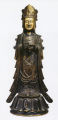 | Kannon (Bodhisattva of Compassion) | | 7th Century CE |
| 12 |
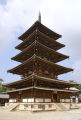 | Horyuji, Five Story Pagoda | | 7th Century CE |
| 13 |
 | Tenjukoku Embroidery | | 7th Century CE |
| 14 |
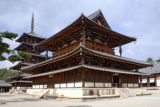 | Horyuji, Kondo (Main Hall) | | 7th Century CE |
| 15 |
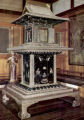 | Tamamushi Shrine | | ca. 650 CE |
| 16 |
 | Horyuji, Kondo (Main Hall) | | 7th Century CE |
| 17 |
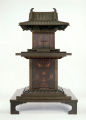 | Tamamushi Shrine, replica | | |
| 18 |
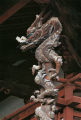 | Horyuji, Kondo (Main Hall), detail of Dragon Posts | | 7th Century CE |
| 19 |
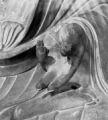 | Yakushi Buddha (detail of left hand in wish-granting mudra) | | second half of 7th Century CE |
| 20 |
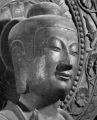 | Yakushi Buddha (detail of head) | | second half of 7th Century CE |
| 21 |
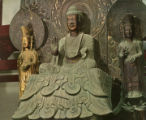 | Shaka Triad | | 623 CE |
| 22 |
 | Yakushi Buddha, detail of Mandorla showing relief Buddha figure | | second half of 7th Century CE |
| 23 |
 | Shaka Triad, rubbing of Shaka's Mandorla | | 623 CE |
| 24 |
 | Development of the Temple Plan in Japan | | |
| 25 |
 | Shaka Triad, detail of Shaka's Mandorla showing relief Buddha figure | | 623 CE |