Images of student and faculty artwork, exhibitions and department events.
TO
| Title | Subject | Classes | ||
|---|---|---|---|---|
| 126 |
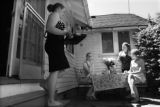 |
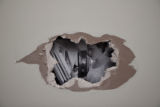
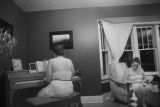
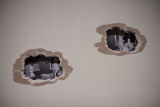
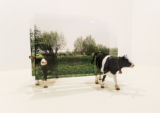
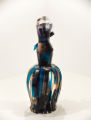
MFA Thesis Exhibition Images: Adelaide Ryder | Student Work; MFA; Graduate Artwork; Photography; Gittins Gallery; MFA Final Thesis Project | |
| 127 |
 |
MFA Thesis Exhibition Images: Adelaide Ryder | Student Work; MFA; Graduate Artwork; Photography; Gittins Gallery; MFA Final Thesis Project | |
| 128 |
 |
MFA Thesis Exhibition Images: Adelaide Ryder | Student Work; MFA; Graduate Artwork; Photography; Gittins Gallery; MFA Final Thesis Project | |
| 129 |
 |
MFA Thesis Exhibition Images: Adelaide Ryder | Student Work; MFA; Graduate Artwork; Photography; Gittins Gallery; MFA Final Thesis Project | |
| 130 |
 |
MFA Thesis Exhibition Images: Adelaide Ryder | Student Work; MFA; Graduate Artwork; Photography; Gittins Gallery; MFA Final Thesis Project | |
| 131 |
 |
MFA Thesis Exhibition Images: Adelaide Ryder | Student Work; MFA; Graduate Artwork; Photography; Gittins Gallery; MFA Final Thesis Project | |
| 132 |
 |
MFA Thesis Exhibition Images: Adelaide Ryder | Student Work; MFA; Graduate Artwork; Photography; Gittins Gallery; MFA Final Thesis Project | |
| 133 |
 |
MFA Thesis Exhibition Images: Adelaide Ryder | Student Work; MFA; Graduate Artwork; Photography; Gittins Gallery; MFA Final Thesis Project | |
| 134 |
 |
MFA Thesis Exhibition Images: Adelaide Ryder | Student Work; MFA; Graduate Artwork; Photography; Gittins Gallery; MFA Final Thesis Project | |
| 135 |
 |
MFA Thesis Exhibition Images: Adelaide Ryder | Student Work; MFA; Graduate Artwork; Photography; Gittins Gallery; MFA Final Thesis Project | |
| 136 |
 |
MFA Thesis Exhibition Images: Adelaide Ryder | Student Work; MFA; Graduate Artwork; Photography; Gittins Gallery; MFA Final Thesis Project | |
| 137 |
 |
MFA Thesis Exhibition Images: Adelaide Ryder | Student Work; MFA; Graduate Artwork; Photography; Gittins Gallery; MFA Final Thesis Project | |
| 138 |
 |
MFA Thesis Exhibition Images: Adelaide Ryder | Student Work; MFA; Graduate Artwork; Photography; Gittins Gallery; MFA Final Thesis Project | |
| 139 |
 |
MFA Thesis Exhibition Images: Adelaide Ryder | Student Work; MFA; Graduate Artwork; Photography; Gittins Gallery; MFA Final Thesis Project | |
| 140 |
 |
MFA Thesis Exhibition Images: Adelaide Ryder | Student Work; MFA; Graduate Artwork; Photography; Gittins Gallery; MFA Final Thesis Project | |
| 141 |
 |
MFA Thesis Exhibition Images: Adelaide Ryder | Student Work; MFA; Graduate Artwork; Photography; Gittins Gallery; MFA Final Thesis Project | |
| 142 |
 |
MFA Thesis Exhibition Images: Adelaide Ryder | Student Work; MFA; Graduate Artwork; Photography; Gittins Gallery; MFA Final Thesis Project | |
| 143 |
 |
MFA Thesis Exhibition Images: Adelaide Ryder | Student Work; MFA; Graduate Artwork; Photography; Gittins Gallery; MFA Final Thesis Project | |
| 144 |
 |
MFA Thesis Exhibition Images: Adelaide Ryder | Student Work; MFA; Graduate Artwork; Photography; Gittins Gallery; MFA Final Thesis Project | |
| 145 |
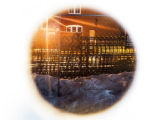 |
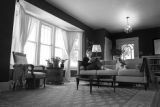
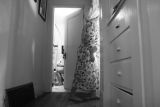
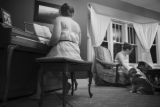
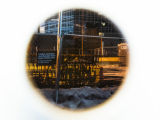
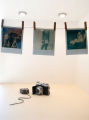
Mini-Series Exhibition Spaces: Photography Club | Student Work; Photography | |
| 146 |
 |
Mini-Series Exhibition Spaces: Photography Club | Student Work; Photography | |
| 147 |
 |
Mini-Series Exhibition Spaces: Photography Club | Student Work; Photography | |
| 148 |
 |
Mini-Series Exhibition Spaces: Photography Club | Student Work; Photography | |
| 149 |
 |
Mini-Series Exhibition Spaces: Photography Club | Student Work; Photography | |
| 150 |
 |
Mini-Series Exhibition Spaces: Photography Club (Salt Photo Society) | Student Work; Photography |