Home
Browse
Ask Us
Chat
Harmful Language Statement
Log in
Art and Art History
Advanced Search
About
Curriculum-based images for use in teaching, research, and learning.
Type
Image
31
Format
image/jpeg
31
Collection
Art and Art History
31
Filters:
Style Period:
"Cambodia: Khmer Empire"
Subject:
"Ruins"
1
-
25
of
31
<
1
2
>
Gallery view
Number of results to display per page
10
25
50
100
200
Sort by Relevance
Sort by Title A-Z
Sort by Title Z-A
Sort by Date Ascending
Sort by Date Descending
Sort by Last Modified Ascending
Sort by Last Modified Descending
Title
Date
Type
1
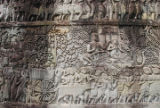
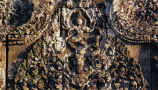
Angkor Thom, Bayon, relief: Battle Scene
Image
2
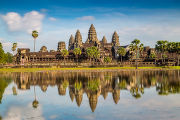
Angkor Wat
Image
3
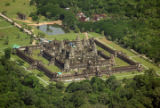
Angkor Wat, aerial view
Image
4
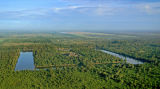
Angkor Wat, aerial view of site and surrounding countryside
Image
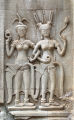
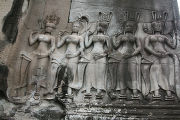
5
Angkor Wat: Apsaras Relief
Image
6
Angkor Wat: Apsaras Relief
Image
7
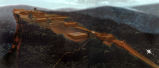
Preah Vihear: Aerial View of the Enclosure of the 4th Level including the Central Sanctuary seen from the Southwest
Image
8
Preah Vihear: Carving Details
Image
9
Preah Vihear: Causeway
Image
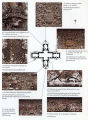
10
Preah Vihear: Floorplan of the 2nd Level Gopura to the 3rd Level Gopura
Image
11
Preah Vihear: Floorplan of the Gopura on the 2nd Level
Image
12
Preah Vihear: Graffiti of Vishnu and Naga
Image
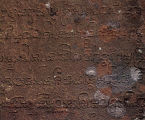
13
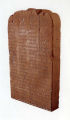
Preah Vihear: Inscription K380 on the Doorjam of the Southern Door of the Gopura of the 4th Level
Image
14
Preah Vihear: Inscription K382
Image
15
Preah Vihear: Inside the Gopura Looking towards the Southern Door (above which is a pediment carved with Umamaheshvara)
Image
16
Preah Vihear: Lion Head Reservoir
Image
17
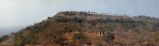
Preah Vihear: Looking South along Preah Vihear Promontory from Mo Ee Daeng
Image
18
Preah Vihear: Monumental Stairway Floor Plan
Image
19
Preah Vihear: Panoramic Drawing
Image
20
Preah Vihear: Part of the South Gopura and Southeast Gallery seen from Peuy Ta Di
Image
21
Preah Vihear: Pediment Showing Krishna Lifting Mount Govardhana
Image
22
Preah Vihear: Plan Showing the Location of Preah Vihear on the Promontory of the Dangrek Mountain
Image
23
Preah Vihear: Second Pillared Causeway
Image
24
Preah Vihear: Shiva Dancing over the Head of an Elephant over a Kala
Image
25
Preah Vihear: Site Plan
Image
1
-
25
of
31
<
1
2
>