| Title | Description | Classes | ||
|---|---|---|---|---|
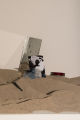
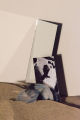
| 76 |
 |
Sculpture I Critique | artwork by Scott Beadles | |
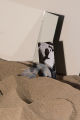
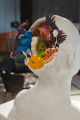
| 77 |
 |
Sculpture I Critique | artwork by Scott Beadles | |
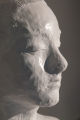
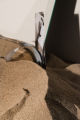
| 78 |
 |
Sculpture I Critique | artwork by Scott Beadles | |
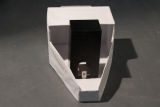
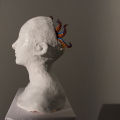
| 79 |
 |
Sculpture I Critique | artwork by Darby DeHart | |
| 80 |
 |
Sculpture I Critique | artwork by Tuoc Lam | |
| 81 |
 |
Sculpture I Critique | artwork by Scott Beadles | |
| 82 |
 |
Sculpture I Critique | artwork by Scott Beadles | |
| 83 |
 |
Sculpture I Critique | artwork by Darby DeHart | |
| 84 |
 |
Sculpture I Critique | artwork by Tuoc Lam | |
| 85 |
 |
Sculpture I Critique | artwork by Scott Beadles | |
| 86 |
 |
Sculpture I Critique | artwork by Scott Beadles | |
| 87 |
 |
Sculpture I Critique | artwork by Tuoc Lam | |
| 88 |
 |
Sculpture I Critique | artwork by Darby DeHart | |
| 89 |
 |
Sculpture I Critique | artwork by Darby DeHart | |
| 90 |
 |
Sculpture I Critique | artwork by Darby DeHart | |
| 91 |
 |
Sculpture I Critique | artwork by Scott Beadles | |
| 92 |
 |
Sculpture I Critique | artwork by Darby DeHart | |
| 93 |
 |
Sculpture I Critique | artwork by Scott Beadles | |
| 94 |
 |
Sculpture I Critique | artwork by Darby DeHart | |
| 95 |
 |
Sculpture I Critique | artwork by Scott Beadles | |
| 96 |
 |
Sculpture I Critique | artwork by Scott Beadles | |
| 97 |
 |
Sculpture I Critique | artwork by Scott Beadles | |
| 98 |
 |
Sculpture I Critique | artwork by Darby DeHart | |
| 99 |
 |
Sculpture I Critique | artwork by Tuoc Lam | |
| 100 |
 |
Sculpture I Critique | artwork by Darby DeHart |