|
|
Title | Creator | Creation Date |
| 1 |
 |
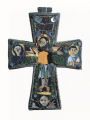
Acts and Epistles: Saints Luke and James (left), Saints Peter and John (right) | | late 13th Century CE |
| 2 |
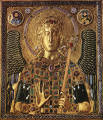 |
Archangel Michael (detail) | | 10th Century CE |
| 3 |
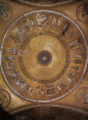 |
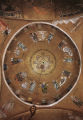
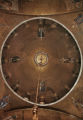
Basilica di San Marco (St. Mark's), Atrium, Abraham cupola, view from below | | late 11th - 12th Century CE |
| 4 |
 |
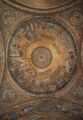
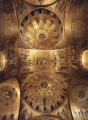
Basilica di San Marco (St. Mark's), Atrium, first Joseph cupola, view from below | | late 11th - 12th Century CE |
| 5 |
 |
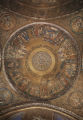
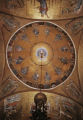
Basilica di San Marco (St. Mark's), Atrium, Moses cupola, view from below | | late 11th - 12th Century CE |
| 6 |
 |
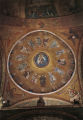
Basilica di San Marco (St. Mark's), Atrium, third Joseph cupola | | late 11th - 12th Century CE |
| 7 |
 |
Basilica di San Marco (St. Mark's), Atrium, third Joseph cupola, view from below | | late 11th - 12th Century CE |
| 8 |
 |
Basilica di San Marco (St. Mark's), central dome, view from below | | late 11th - 12th Century CE |
| 9 |
 |
Basilica di San Marco (St. Mark's), east dome, view from below | | late 11th - 12th Century CE |
| 10 |
 |
Basilica di San Marco (St. Mark's), Nave, view of the domes from the west | | late 11th - 12th Century CE |
| 11 |
 |
Basilica di San Marco (St. Mark's), Nave, view of the domes from the west | | late 11th - 12th Century CE |
| 12 |
 |
Basilica di San Marco (St. Mark's), north dome, view from below | | late 11th - 12th Century CE |
| 13 |
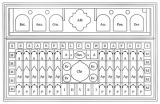 |
Basilica di San Marco (St. Mark's), Pala d'Oro, decoration plan | | 976 - 1204 CE |
| 14 |
 |
Basilica di San Marco (St. Mark's), south dome, view from below | | late 11th - 12th Century CE |
| 15 |
 |
Basilica di San Marco (St. Mark's), view into the vaulting and cupolas | | late 11th - 12th Century CE, |
| 16 |
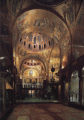 |
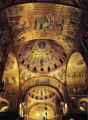
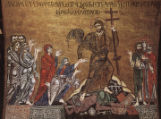
Basilica di San Marco (St. Mark's), view of the Nave and Barrel Vaults of the Central Crossing, showing the mosaics of the Crucifixion and Resurrection | | late 11th - 12th Century CE |
| 17 |
 |
Basilica di San Marco (St. Mark's), west dome, view from below | | late 11th - 12th Century CE |
| 18 |
 |
Basilica di San Marco (St. Mark's), west vault moasic: Anastasis (detail) | | late 11th - 12th Century CE |
| 19 |
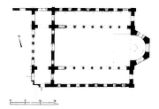 |
Basilica of St. John, Stoudios Monastery (Imrahor Camii), groundplan | | 2nd half of 5th Century CE |
| 20 |
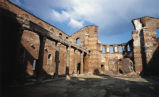 |
Basilica of St. John, Stoudios Monastery (Imrahor Camii), interior view facing north | | 2nd half of 5th Century CE |
| 21 |
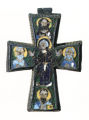 |
Beresford Hope Cross, back view | | second half of 9th Century CE |
| 22 |
 |
Beresford Hope Cross, front view | | second half of 9th Century CE |
| 23 |
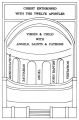 |
Cathedral of Eufrasius, ground plan | | c. 550 CE |
| 24 |
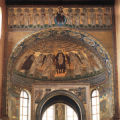 |
Cathedral of Eufrasius, main apse, vault and triumphal arch | | c. 553 CE |
| 25 |
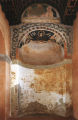 |
Cathedral of Eufrasius, south apse | | c. 553 CE |